please scroll down for english version :)
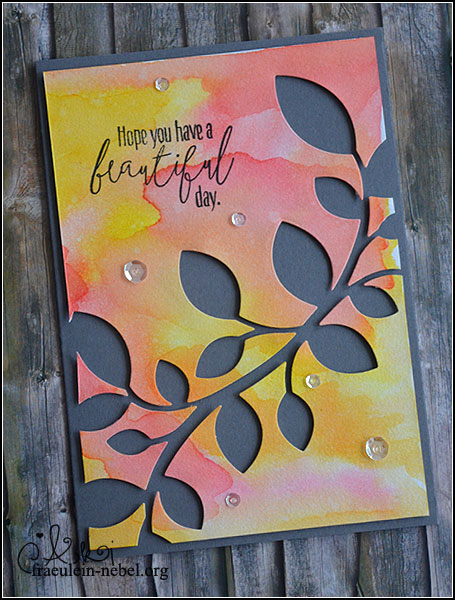
Geburtstagskarte von vor gefühlt hundert Jahren – aus dem Juli nämlich. Gesendet wurde sie an Missi und vor lauter lauter habe ich vergessen ein Foto davon zu machen. Liebe Missi, vielen Dank für’s Ablichten! :D
Mal wieder easy peasy, kennt ihr ja.
Aquarellpapier nass machen und Farben *reintropfen, reinmalen – wie es euch gefällt. Das Wasser arbeitet für euch, wenn ihr es lasst, also bringt mit dem Pinsel am besten nur die Farben auf und freut euch, wenn’s schicke Effekte gibt.
Trocknen lassen und bei Bedarf noch eine Schicht Farbe drüber. Die zweite Schicht trockne ich gerne mit dem Heißluftföhn, dann gibt es diese „schärferen“ Ränder.
Der schwierigste Teil kommt jetzt: das wunderschöne Panel mit Stanze durch die BigShot jagen und damit zerschneiden. Ein bisschen drüber jammern, während gekurbelt wird und dann aufpassen, dass keine Kleinteile verloren gehen. 3D Klebeband gibt der Chose noch mehr Tiefe, dann kommt das Negativ richtig schön zur Geltung.
Ein paar Pailletten drauf, ein nettes Sprüchlein dazu – fertig!
*Nachtrag: Unklug ausgedrückt – ich nehme Farbe mit einem Pinsel auf und tupfe den dann auf’s Papier. ^^“
english version
I made this birthday card in july for my friend Missi – she took the photo, too, because I totally forgot that part, haha.
The card is easy to make, like a lot of my cards are. ;)
First, add some water to your watercolour paper and drop some colour on. The water does the work for you if you allow it to; the best thing is to really just add colour and be happy about the nice blending. ;)
Let it dry and add another layer of colour after. I like to dry the second coat with my heat tool to get some hard edges over all the blending.
Putting the panel into your BigShot and cutting it apart is the hardest part in the process. Be carefull to not loose any small pieces from your panel, you will need them all!
Add some 3D foam behind the panel and the smaller parts and fill in your design on a card base. Use the positive piece to glue the background in place, it might be helpful to find the right spot for the smaller pieces.
Glue down some sequins and add your sentiment – done!
Material
Papier: SU! „antrazit“, Aquarellpapier
Tinte & Farben: Versafine „onyx black“, Ranger Distress Ink „picked rasberry“, „barn door“, „wild honey“, „squeezed lemonade“
Stempel: Wplus9 „doodle buds“
Stanzen: SSS „clustered leaves“
Sonstiges: Falzbein, Fiskars Schneidbrett, BigShot, EK Success Tweezers, Ranger Multi Medium „matt“, Pinsel & Wasserglas, SSS 3D Klebeband, Heißluftföhn, Pailletten T€Di

2 comments
Hallo Aki,
du tropfst die Farbe aufs Papier? Ich mache das mit dem Pinsel. Beim Tropfen muss das Papier aber auch ordentlich nass sein oder?
Schöne Grüße
Suzu
Ich merke grad, dass ich das unklug ausgedrückt habe. *lol* Ich mache das Papier erst nass, nehme dann mit dem Pinsel farbe auf und tupfe den auf’s Papier.
Korrigier ich mal.. :)