[Werkeltisch] #152 – You’re CuTe

Header Werkeltisch

please scroll down for english version :)

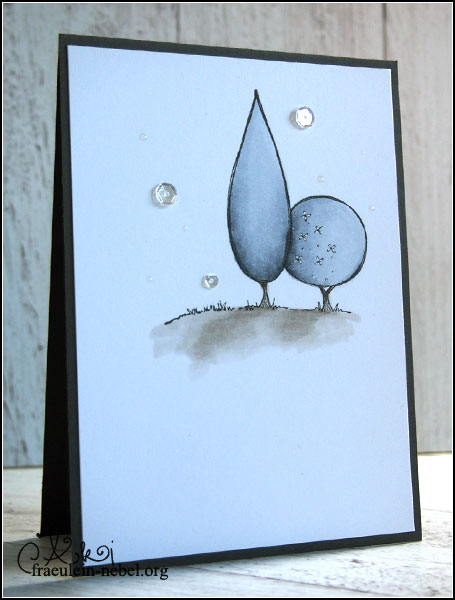
Mal was ganz anderes von mir, oder? Ich hab‘ schon ewig kein gemustertes Papier mehr benutzt, hier hat’s irgendwie danach geschrieen. Gestempelt hatte ich auf ein schmales Reststück, ich wollte eigentlich nur mal sehen, ob ich eine Figur zufriedenstellend mit Copics colorieren kann. Kann ich, also wollte ich es nutzen. :)

Karte "You're CuTe" mit The Greeting Farm und Copic Markern | fraeulein-nebel.org

Die Dame stammt aus dem Hause „The Greeting Farm“ und wurde mit Memento-Tinte gestempelt. Eine Tinte auf Wasserbasis, also geeignet um mit Copics zu colorieren, die ja Alkoholmarker sind.
Coloriert habe ich auf die „klassische“ Weise, von hell nach dunkel und wieder zurück.
Das Stück Papier durch die BigShot, mit einer Rahmenstanze – geschummelte Stickerei, seht ihr’s? – ein wenig Pepp verpasst und auf ein Stück grünes Musterpapier aufgeklebt. Das Grün passte gut zu den Grüntönen der Copic Marker, und ich mag Grün lieber als Gelb. ;)

Ein Text aus dem selben Set dazu.. es verdient seinen Namen „Nerds Out“, oder? „Cu“ wusste ich noch, das ist Kupfer, „Te“ musste ich googeln: Tellur. Chemie war nie so mein Ding. |D
Ahja, und weil mir ein glatter Rand nicht gefallen hat, habe ich den Rand noch gestanzt. Leider hat die Stanze nicht alle Lagen sauber geschnitten und ich wollte mit der Schere nachhelfen (anstatt einfach nochmal durch die BigShot, was einfacher und sauberer gewesen wäre – blonder Moment!), deswegen sieht der etwas gefleddert aus.

english version

Today I have something different for you – it has been a long time since I used patterned paper! But I HAD to use it for this card.
I wanted to know if I could colour a whole figurine so I stamped it on a piece of scratch paper – and found out after that yes, I can colour it and it looks okayish, so I wanted to use it.

I stamped the girl with Memento ink, which is a waterbased ink. That makes it perfect for Copic colouring, because Copics are alcohol markers – the ink won’t bleed. I coloured in the most basic way possible; from light to dark and back to my lightest colour.
To add some interest to the small strip of paper, I added some faux stitching with a die, then glued the panel on a piece of green patterned paper. The green matched the green from my Copics quite well – and I like green more than yellow. ;)

The sentiment is from the same stamp set – it really fits the name „Nerds Out“, doesn’t it? I had to google what Te stands for (Tellur), but was able to remember Cu.
I did not like a straight edge on the card, so I put it into my BigShot and added a squiggly border. Unfortunately the die did not cut through all of the layers and I took my scissors to cut the rest. I should have put it into the BigShot once more. The outcome would have looked better, but I did not think that far.

Material

Papier: SU! „vanille pur“, gemustertes Papier Aldi Süd
Tinte & Farben: Memento „tuxedo black“, Copic CIAO
Stempel: The Greeting Farm „Anya Nerds Out“
Stanzen: lawn fawn „stitched rectangles large“, die-namics „jumbo squiggle border“
Sonstiges: Falzbein, Fiskars Schneidbrett, BigShot, dm Kleberoller „paradies“, Papierschere, Acrylblock, SU! Stampin‘ Dimensionals

[Werkeltisch] #148 – graue Bäume mit PurpleOnionDesigns

Header Werkeltisch

please scroll down for english version :)

Ehm jah. Ich weiß gerade nicht genau, was ich über die Karte sagen soll. Weil kein Text draufsteht, könnte man sie theoretisch vielseitig einsetzen. Praktisch sieht sie für mich aus wie eine Trauerkarte – weil wegen Farben, Bäumen und nochmal Farben. War nicht so geplant, ich habe nämlich Schwierigkeiten mit Trauerkarten, noch mehr als mit Hochzeitskarten.
Aber tjanun, anscheinend habe ich ungewollt eine Trauerkarte gewerkelt.

Karte "graue Bäume" mit PurpleOnionDesigns und Copic Marker | fraeulein-nebel.org

Die Bäumchen kommen aus dem Hause PurpleOnionDesigns, die haben nur RubberStamps – also Gummistempel. Nur den Gummiteil, um den Schaumstoffteil muss man sich selbst kümmern. Ist nicht weiter tragisch, und das Montieren der Stempel macht sogar Spaß. :D Den Hersteller kannte ich schon länger, die Motive waren mir bisher aber zu „süßlich“. Aber die Bäumchen und Blümchen.. genau mein Ding.

So. Bäume gestempelt, mit Copics coloriert und den Grasboden nochmal nachgestempelt. Zum Stempeln mit Gummistempeln nutze ich übrigens gerne einen klassischen Stempelpositionierer, ansonsten werden meine Abdrücke grundsätzlich schief.
Das fertig colorierte Panel habe ich auf eine graue Base geklebt und als Dekogedöhns noch ein paar Pailletten aufgeklebt. Und weil ich dafür mein Glossy Accents eh draußen hatte, habe ich grad noch ein paar Punkte dazu getropft.
___________________________________________

I don’t really know what to tell you about this card. You could use it for anything, really, since there is no sentiment stamped on it. But because of the colours and the trees it looks like a sympathy card. Well, that was not planned – I tend to struggle creating sympathy cards, even more than wedding cards. But it seems that I created one by accident.

The trees are from PurpleOnionDesigns, a stamp company selling rubber stamps only. And by rubber stamps I mean the rubber part; you need to buy the foam to mount it on. It was kinda fun to mount the stamps, by the way. :) I’ve heard of that company long time ago but never liked their images. They looked way to cute and childlike to me; but I really like their new collections of flowers and trees.

I stamped the trees in copic friendly ink and coloured them with copic markers. I like to use a classic stamp positioner for stamping with rubber stamps – else my images turn out all crooked. :twisted:
The stamped panel is mounted on a base of plain grey cardstock. To add a bit more detail I glued on some sequins. I also added some tiny dots of Glossy Accents to go with the sequins.

Material

Papier: SU! >“schiefergrau“, „vanille pur“
Tinte & Farben: Memento „tuxedo black“, Copic Marker CIAO
Stempel: Stacey Yacula Studio für PurpleOnionDesigns „garden trees“
Stanzen:
Sonstiges: Falzbein, Fiskars Schneidbrett, dm Kleberoller „paradies“, Pailletten, Ranger Multi Medium „matt“, EK Success Tweezers, Ranger Glossy Accents, SU! stamp-a-majig

[Werkeltisch] #145 – happy purrday

Header Werkeltisch

please scroll down for english version :)

Der Held hat Geburtstag! Dieses Jahr habe ich tatsächlich schon zwei Tage vorher eine Karte fertig gehabt. Von Anfang an habe ich gewusst, wie das Ding aussehen soll, welche Stempel ich verwenden will.. nur der Text, der war dann improvisiert.
Gefallen hat sie, ich freu mich. :)

Karte "happy purrday" mit The Greeting Farm & Lawn Fawn | fraeulein-nebel.org

So. Lange Erklärungen braucht es hier nicht, die Karte war sehr einfach zu machen.
Der Hintergrund wurde Ton in Ton gewischt; Papier zurecht legen, Stencil drüber festkleben und los geht die Wischerei! ProTipp: Auch das Papier irgendwie festkleben, gerade bei detailreichen Schablonen verruscht gerne mal was.
Trocknen lassen, währenddessen wurde die niedliche Katze ins Leben gerufen.

Das Set von „The Greeting Farm“ stand schon lange auf meiner Liste, war aber – wie so viele andere Dinge – immer wieder ausverkauft, wenn ich in Amiland bestellen wollte. Bei der letzten Bestellung hatte ich aber Glück! Die Katzen sind alle so niedlich pummelig und tapsig, genau mein Ding. Dicke Tiere, damit kriegt man mich immer. :eek:
Zum Colorieren habe ich die Copics wieder ausgekramt. Im Nachhinein bedaure ich ein wenig, dass ich Fell nicht wirklich darstellen kann. Manche Leute machen das mit winzigen Pünktchen in verschiedenen Farben, aber ich kriege das nicht hin. Noch nicht, ich arbeite dran. ;)

Beim Text war ich mir unsicher. Wenn Katzen sprechen könnten.. wäre es dann „happy meowday“, „happy purrday“ oder doch was anderes? Am Ende habe ich mich für „purrday“ entschieden, auch weil ich im Inneren der Karte ein „I love mew“ aus dem Stempelset eingesetzt habe. Wäre mir sonst etwas zuviel Gemaunze gewesen.
Bei selbst kreierten Texten hilft ein ordentlichen Alphabetset ungemein! Am Besten was mit mehreren Exemplaren pro Buchstabe, damit man zumindest einen Großteil des Textes in einem Durchgang stempeln kann.

Katze und Muffin habe ich mit 3D-Foam aufgeklebt, sah spannender aus als flach auf der Karte. Zum krönenden Abschluss ein bisschen Glitzer auf den Muffin.. fertig!
Happy Birthday an den Helden. :eek:

___________________________________________

It’s my boyfriend’s birthday! I managed to finish his birthday card two days early – yay! (That did not work last year – I finished the card 30 minutes before he came home from work, haha)
I knew from the beginning what I wanted it to look like, what stamps to use.. the only thing I wasn’t sure about was the sentiment.

The card was pretty simple to make. First, I temporarily adhered my stencil over my paper and started blending in the pattern. (protip: you should adhere your paper onto your table – it might shift while you blend over a very detailed stencil!)
After that, I started colouring in my cat with Copic Markers while the Distress Ink was drying. I’m in love with this cat by the way. Chubby animals of all sorts – show me any chubby animal, I will fall in love with it head over heels. :eek:
In retrospect I could have coloured the fur differently – to make it look more like fur, but that’s hard for me. Some people fake the look of fur by adding small dots of colour – I can’t do that yet.

Now the sentiment. What do you think – if cats could speak, how would they say „happy birthday“? Something like „happy meowday“? Or „happy purrday“? I decided for „purrday“, also because I stamped „I love mew“ on the inside.
If you want to stamp your own sentiments you NEED a good alphabet set, the best thing would be one with more than one of each letter so you can stamp most of your text in one go. :)

I mounted the cat and muffin with some 3D foam and added some glitter over the muffin to finish it off.
Happy birthday, boyfriend! :eek:

Material

Papier: Neenah „desert storm“
Tinte & Farben: Memento „tuxedo black“, Memento Dual Marker „tuxedo black“, Ranger Distress Ink „antique linen“, Wink of Stella Glitterpen „clear“
Stempel: The Greeting Farm „purfect cats“, lawn fawn „milo’s ABCs“
Stanzen:
Sonstiges: Falzbein, Fiskars Schneidbrett, Stencil Create A Smile „in circles“, Ranger Mini-InkBlending Tool, Papierschere, MISTI Stamping Tool, SU! Stampin‘ Dimensionals